STORY HIGHLIGHTS
- Studies have shown people generally find women's voices more pleasing than men's
- Scholar: "It's much easier to find a female voice that everyone likes than a male voice"
- In Germany, some BMW drivers refused to take GPS directions from a woman
- Tech companies may avoid male computer voices because of HAL from the move "2001"
(CNN) -- To most owners of the new iPhone, the
voice-activated feature called Siri is more than a virtual "assistant"
who can help schedule appointments, find a good nearby pizza or tell you
if it's going to rain.
She's also a she.
Siri answers questions in a part-human, part-robot voice that's deep,
briskly efficient and distinctly female. (At least in the U.S. and four
other countries. In France and the UK, Siri is male.)
People describe the app using female pronouns. Her gender has even
prompted some users to flood blogs and online forums with sexually
suggestive questions for Siri such as "What are you wearing?" (Siri's
baffled response: "Why do people keep asking me this?")
The fuss over Siri's sex also raises a larger question: From
voice-mail systems to GPS devices to Siri and beyond, why are so many
computerized voices female?
One answer may lie in biology. Scientific studies have shown that people generally find women's voices more pleasing than men's.
"It's much easier to find a female voice that everyone likes than a
male voice that everyone likes," said Stanford University Professor
Clifford Nass, author of "The Man Who Lied to His Laptop: What Machines
Teach Us About Human Relationships." "It's a well-established phenomenon
that the human brain is developed to like female voices."
HAL, the homicidal artificial intelligence in "2001: A space
Odyssey," may have scared manufacturers away from male automated voices.
Research suggests this preference starts as early as the womb, Nass
said. He cites a study in which fetuses were found to react to the sound
of their mother's voice but not to other female voices. The fetuses
showed no distinct reaction to their father's voice, however.
Another answer lies in history. According to some sources, the use of
female voices in navigation devices dates back to World War II, when
women's voices were employed in airplane cockpits because they stood out
among the male pilots. And telephone operators have traditionally been
female, making people accustomed to getting assistance from a
disembodied woman's voice.
When automakers were first installing automated voice prompts in cars
("your door is ajar") decades ago, their consumer research found that
people overwhelmingly preferred female voices to male ones, said Tim
Bajarin, a Silicon Valley analyst and president of Creative Strategies
Inc.
This may explain why in almost all GPS navigation systems on the
market, the default voice is female. One notable exception has been
Germany, where BMW was forced to recall a female-voiced navigation
system on its 5 Series cars in the late 1990s after being flooded with
calls from German men saying they refused to take directions from a
woman.
"Cultural stereotypes run deep," said Nass, who details the BMW episode in his book.
Voice casting
Most companies that produce automated voices hold auditions for voice
actors and collect recordings of them speaking. Then they invite focus
groups to listen to the recordings and rate the voices on how well they
convey certain attributes: warmth, friendliness, competence and so on.
"It's casting," Nass said. "It's something Hollywood has known for a long, long time."
Look no further than examples of automated or artificial-intelligence
voices in sci-fi movies and TV shows. Voices of authority or menace
tend to be male: the homicidal HAL 9000 computer in "2001: A Space
Odyssey," the computer program in "WarGames," or Auto, the spaceship's
autopilot function in "Wall-E." More subservient talking machines, such
as the onboard computer from the "Star Trek" TV series, skew female.
Bajarin, the Silicon Valley analyst, believes that more computerized
voices would be masculine if not for the associations with HAL, whose
malicious intent in the 1968 Stanley Kubrick film was made even creepier
by his soothing tone.
"A lot of tech companies stayed away from the male voice because of
HAL," he said. "I've heard that theory tossed around multiple times."
(One prominent exception: The chipper "You've got mail!" voice from
AOL's dial-up days.)
What Apple did is absolutely brilliant. They took Siri and gave it more of a personality.
Norman Winarsky
When it comes to consumer applications of computerized voices, the
sex of the voice is usually determined by what service or product is
employing it. For example, transit systems such as the San Francisco
Area's BART often use higher-pitched voices because they are easier to
hear over the clatter of the train cars.
Nuance, a Massachusetts-based company that develops speech
technologies for Ford vehicles' SYNC system, Amazon e-readers and other
clients, creates both male and female voices. It's then up to the client
to choose which voice, and gender, best fits their product, said chief
creative officer Gary Clayton.
"As these products become part of our everyday lives, there's a huge
opportunity for personalization," added Brant Ward, the company's
director of advanced speech design. "I could have an approximation of my
wife's voice read me a text message in my car."
Siri: Brilliant or sexist?
Siri, the iPhone 4S's voice, grew from a five-year research project
that was funded by military agency DARPA and led by SRI International, a
Bay Area research institute. The project spawned a company, also called
Siri, that launched an iPhone app in February 2010 and was acquired by
Apple two months later.
That original Siri voice-to-text app -- powered in part by Nuance's
technology -- also worked by people speaking commands into their phones,
although it didn't talk back. And it had no gender. In fact, the app
was originally conceived to speak in a gender-neutral voice, said Norman
Winarsky, vice president of SRI and a co-founder of Siri.
"What Apple did is absolutely brilliant," said Winarsky, who calls speech "the most natural of all human interfaces."
"They took Siri and gave it more of a personality," he said. "It's
the first real artificial intelligence working in millions of people's
hands."
An Apple spokeswoman declined to comment on why the company gave Siri
a female voice in the U.S. Nor would she say why Siri speaks like a man
in the UK, where iPhone 4S owners have swarmed online forums to request
a female voice instead. "Eww!! Hope UK gets female voice soon," wrote
one commenter. "I don't think anyone in the US cares about male voice
option."
Many GPS devices and computer text-to-speech programs now offer
multiple voice options. And someday soon, voice-technology experts say,
Siri will probably speak in a variety of voices, too.
Until then, some bloggers have wondered: Are computerized female "assistants" sexist?
Not necessarily, said Rebecca Zorach, director of the Social Media
Project at the University of Chicago's Center for the Study of Gender
and Sexuality.
"I think they have to be understood in a broader context in which
they're one small piece," she wrote in an e-mail to CNN. "Voices
intended to convey authority (such as voice-over narration in films)
tend to be male. So yes, probably these compliant female robot voices
reinforce gender stereotypes, not just because they serve the user but
because the technology itself is about communication and relationships
(areas that women are presumed to be good at).
"I wouldn't automatically claim any sexism in individual companies'
choices, though. Most such decisions are probably the result of market
research, so they may be reflecting gender stereotypes that already
exist in the general public."
Zorach listened to some sound clips of Siri online, then e-mailed back again.
"What's interesting to me is how they seem to intentionally make her
speech sound artificial -- they could choose to make her speech more
seamless and human-like, but they choose instead to highlight the
technology," she said. "That makes you aware of how high-tech your
gadget is."


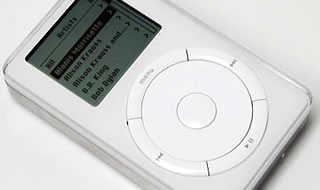 The first iPod was developed in less than a year and although it didn't flip the
music industry upside down overnight – in fact received a lot of criticism – it
laid the conceptual framework for grander things to come. Powered by a dual-core
90MHz ARM-based PortalPlayer processor and 5GB 4200RPM Toshiba HDD (a 10GB
version came later), the rudimentary device only supported Mac computers as well
as AAC, MP3 and WAV audio files. The first version of iTunes for Mac was
released the same year in January. Also: Watch the
The first iPod was developed in less than a year and although it didn't flip the
music industry upside down overnight – in fact received a lot of criticism – it
laid the conceptual framework for grander things to come. Powered by a dual-core
90MHz ARM-based PortalPlayer processor and 5GB 4200RPM Toshiba HDD (a 10GB
version came later), the rudimentary device only supported Mac computers as well
as AAC, MP3 and WAV audio files. The first version of iTunes for Mac was
released the same year in January. Also: Watch the 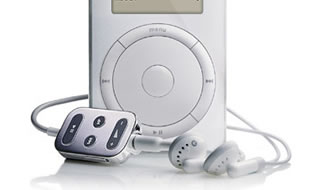 Apple's second-generation music player arrived less than a year after the
original device and brought several refinements including a cover for the
FireWire port, an improved Hold switch and double the storage capacity. It also
abandoned the first-gen's mechanical scroll wheel in favor of the
touch-sensitive wheel used on many future iPods. This model introduced support
for Windows via Musicmatch, prior to this tech-savvy users were forced to use
workarounds for Windows compatibility.
Apple's second-generation music player arrived less than a year after the
original device and brought several refinements including a cover for the
FireWire port, an improved Hold switch and double the storage capacity. It also
abandoned the first-gen's mechanical scroll wheel in favor of the
touch-sensitive wheel used on many future iPods. This model introduced support
for Windows via Musicmatch, prior to this tech-savvy users were forced to use
workarounds for Windows compatibility.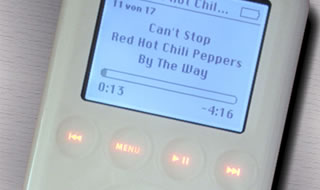 By April 2003, Apple prepared a full redesign of the iPod, adding an all-touch
interface, a dock connector, a slimmer body and the maximum storage capacity was
doubled to 40GB. The company also brought its own media platform (iTunes 4.1) to
Windows, severing ties with Musicmatch. The iPod's increasing popularity
prompted retailers Best Buy, Target and Dell to carry the device between 2002
and 2003. Microsoft and Creative prepared their rivals, the Media2Go and Nomad
Zen.
By April 2003, Apple prepared a full redesign of the iPod, adding an all-touch
interface, a dock connector, a slimmer body and the maximum storage capacity was
doubled to 40GB. The company also brought its own media platform (iTunes 4.1) to
Windows, severing ties with Musicmatch. The iPod's increasing popularity
prompted retailers Best Buy, Target and Dell to carry the device between 2002
and 2003. Microsoft and Creative prepared their rivals, the Media2Go and Nomad
Zen.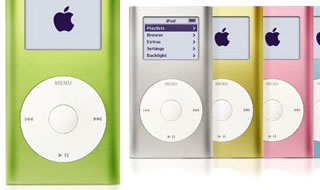 After focusing on adding features to its original design, Apple went back to the
drawing board and introduced a scaled-down minimalist iPod. The $249 iPod Mini
was the first to have Apple's Click Wheel and only offered 4GB of storage.
Despite its slimmer, trendier design, many criticized the device's value. Around
the same time, Apple replaced its $299 10GB iPod with a 15GB model, forcing
retailers to reduce the 10GB model to $249. This caused consumers to be even
more skeptical of the Mini.
After focusing on adding features to its original design, Apple went back to the
drawing board and introduced a scaled-down minimalist iPod. The $249 iPod Mini
was the first to have Apple's Click Wheel and only offered 4GB of storage.
Despite its slimmer, trendier design, many criticized the device's value. Around
the same time, Apple replaced its $299 10GB iPod with a 15GB model, forcing
retailers to reduce the 10GB model to $249. This caused consumers to be even
more skeptical of the Mini. The first fourth-gen version came in July with a redesigned Hold switch and the
iPod Mini's Click Wheel. In October, Apple introduced a premium version called
the iPod Photo ($499-$599), which had improved battery life (15 hours versus
12), a color screen and support for common image formats, which was especially
cool for album art. In February 2005, Apple replaced the 40GB iPod Photo with a
thinner, cheaper 30GB model. By June, it decided to merge the iPod Photo and
iPod “Classic” lines. (Picture shows first U2 special edition iPod).
The first fourth-gen version came in July with a redesigned Hold switch and the
iPod Mini's Click Wheel. In October, Apple introduced a premium version called
the iPod Photo ($499-$599), which had improved battery life (15 hours versus
12), a color screen and support for common image formats, which was especially
cool for album art. In February 2005, Apple replaced the 40GB iPod Photo with a
thinner, cheaper 30GB model. By June, it decided to merge the iPod Photo and
iPod “Classic” lines. (Picture shows first U2 special edition iPod).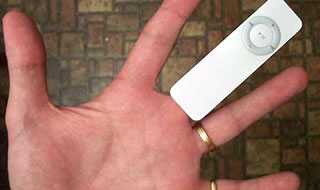 Shrinking its media player further, Apple introduced the first iPod Shuffle in
early 2005. It served as an entry-level model with only 512MB or 1GB of storage
and no display. Pricing was originally set at $99-$149. The second-gen Shuffle
arrived well over a year later. It was roughly half the size of its predecessor
with a belt clip and a more attractive aluminum case. Apple called it the "most
wearable iPod ever." Despite its smaller size, it doubled storage capacities to
1GB and 2GB.
Shrinking its media player further, Apple introduced the first iPod Shuffle in
early 2005. It served as an entry-level model with only 512MB or 1GB of storage
and no display. Pricing was originally set at $99-$149. The second-gen Shuffle
arrived well over a year later. It was roughly half the size of its predecessor
with a belt clip and a more attractive aluminum case. Apple called it the "most
wearable iPod ever." Despite its smaller size, it doubled storage capacities to
1GB and 2GB.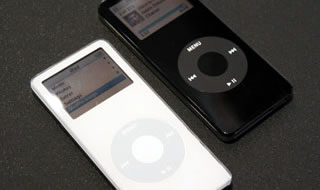 The second-gen iPod Mini landed shortly after the first Shuffle and offered an
incredible battery life of 18 hours (the first Mini lasted 8 hours). It also
introduced a 6GB model along with minor cosmetic tweaks. The Mini line was
discontinued later in 2005 when Apple shipped the first iPod Nano, which was
essentially a smaller version of the Mini (half the thickness and roughly 11mm
narrower). However, it had less maximum storage (4GB max versus 6GB) and a
shorter 14-hour battery life.
The second-gen iPod Mini landed shortly after the first Shuffle and offered an
incredible battery life of 18 hours (the first Mini lasted 8 hours). It also
introduced a 6GB model along with minor cosmetic tweaks. The Mini line was
discontinued later in 2005 when Apple shipped the first iPod Nano, which was
essentially a smaller version of the Mini (half the thickness and roughly 11mm
narrower). However, it had less maximum storage (4GB max versus 6GB) and a
shorter 14-hour battery life.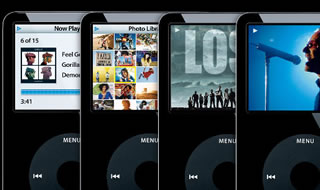 2005 was a monumental period for the iPod. Along with refining the fourth-gen
iPod and releasing the Mini 2, Nano 1, Shuffle 1, Apple unveiled a completely
redesigned fifth-gen iPod with a thinner case, a larger 2.5-inch 320 x 240
screen, and support for common video formats such as MP4 and H.264. The latter
feature earned it the nickname "iPod Video." Additionally, sales skyrocketed
400% to 22.5 million units this year, dwarfing all previous years combined.
2005 was a monumental period for the iPod. Along with refining the fourth-gen
iPod and releasing the Mini 2, Nano 1, Shuffle 1, Apple unveiled a completely
redesigned fifth-gen iPod with a thinner case, a larger 2.5-inch 320 x 240
screen, and support for common video formats such as MP4 and H.264. The latter
feature earned it the nickname "iPod Video." Additionally, sales skyrocketed
400% to 22.5 million units this year, dwarfing all previous years combined.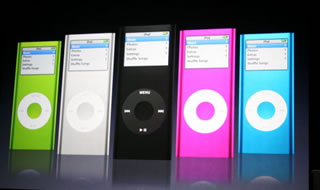 Compared to the year prior, 2006 was fairly mild for the iPod, though its sales
remained strong and represented nearly half of Apple's total revenue. It brought
a new version of the increasingly popular Nano, which offered a
scratch-resistant anodized aluminum casing, more color choices, a brighter
display, double the storage size and a huge boost in battery life from 14 to 24
hours. The second-gen Shuffle was also released, as was a 80GB version of the
fifth-gen iPod.
Compared to the year prior, 2006 was fairly mild for the iPod, though its sales
remained strong and represented nearly half of Apple's total revenue. It brought
a new version of the increasingly popular Nano, which offered a
scratch-resistant anodized aluminum casing, more color choices, a brighter
display, double the storage size and a huge boost in battery life from 14 to 24
hours. The second-gen Shuffle was also released, as was a 80GB version of the
fifth-gen iPod.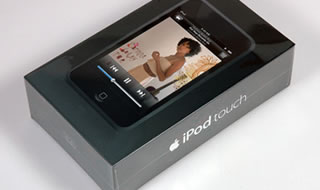 In an ironic twist, considering the iPod is arguably responsible for the
iPhone's creation, Apple introduced the music player's greatest overhaul.
Utilizing existing iPhone hardware and software, it was the first iPod to
feature a multitouch display and Wi-Fi, the latter of which allowed users to
browse the Web via Safari as well as access the iTunes Store and YouTube. It
only lacked the iPhone's cellular connectivity and services along with its
speakers and camera.
In an ironic twist, considering the iPod is arguably responsible for the
iPhone's creation, Apple introduced the music player's greatest overhaul.
Utilizing existing iPhone hardware and software, it was the first iPod to
feature a multitouch display and Wi-Fi, the latter of which allowed users to
browse the Web via Safari as well as access the iTunes Store and YouTube. It
only lacked the iPhone's cellular connectivity and services along with its
speakers and camera.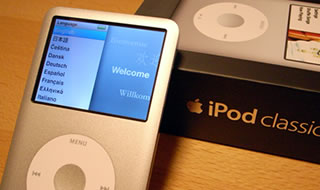 The "Classic" branding for the traditional iPod didn't come until its sixth
generation. Apple's latest addition shed the familiar white polycarbonate front
plate for silver anodized aluminum and it abandoned the special edition models.
It also had a thinner shell, a revamped user interface, and offered up to 36
hours of music and 6 hours of video playback.
The "Classic" branding for the traditional iPod didn't come until its sixth
generation. Apple's latest addition shed the familiar white polycarbonate front
plate for silver anodized aluminum and it abandoned the special edition models.
It also had a thinner shell, a revamped user interface, and offered up to 36
hours of music and 6 hours of video playback.
 The fourth-gen Nano reintroduced the elongated shell, though Apple managed to
shave 0.5mm off the thickness and 12.5mm off the weight despite adding a larger
display, more storage, as well as an accelerometer for horizontal viewing
(videos, namely) and the ability to shuffle songs by shaking the device. This
design was refined the following year as the fifth-gen iPod Nano gained a larger
screen, a camera, an FM radio, a speaker, a pedometer, improved jack placement
and a polished paint job.
The fourth-gen Nano reintroduced the elongated shell, though Apple managed to
shave 0.5mm off the thickness and 12.5mm off the weight despite adding a larger
display, more storage, as well as an accelerometer for horizontal viewing
(videos, namely) and the ability to shuffle songs by shaking the device. This
design was refined the following year as the fifth-gen iPod Nano gained a larger
screen, a camera, an FM radio, a speaker, a pedometer, improved jack placement
and a polished paint job.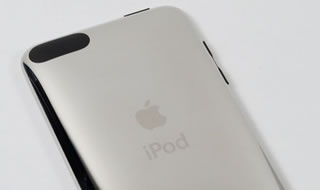 As with the iPhone, the iPod Touch remained largely unchanged through its first
few revisions. The second-gen device received a tapered chrome back, volume
buttons and a built-in speaker. More importantly, it was the first iPod to ship
with Apple's recently launched App Store. Unsurprisingly, the third-gen iPod
Touch mirrored the iPhone 3GS' changes, which included a quicker processor and
graphics core, more RAM, Voice Control support, and a model with 64GB of flash
storage.
As with the iPhone, the iPod Touch remained largely unchanged through its first
few revisions. The second-gen device received a tapered chrome back, volume
buttons and a built-in speaker. More importantly, it was the first iPod to ship
with Apple's recently launched App Store. Unsurprisingly, the third-gen iPod
Touch mirrored the iPhone 3GS' changes, which included a quicker processor and
graphics core, more RAM, Voice Control support, and a model with 64GB of flash
storage.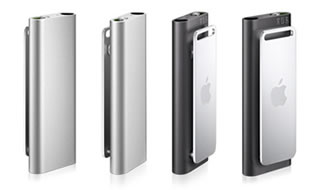 Although Apple refreshed the second-gen Shuffle several times with new colors,
the series went nearly three years without a serious overhaul. Its successor
shipped in March 2009 with twice the storage (4GB), a smaller body that was
reminiscent of Apple's first Shuffle design, and a completely new interface.
Instead of hardware buttons on the device itself, Apple moved the volume and
playback controls to the right earbud cable and introduced VoiceOver
functionality for hands-free control.
Although Apple refreshed the second-gen Shuffle several times with new colors,
the series went nearly three years without a serious overhaul. Its successor
shipped in March 2009 with twice the storage (4GB), a smaller body that was
reminiscent of Apple's first Shuffle design, and a completely new interface.
Instead of hardware buttons on the device itself, Apple moved the volume and
playback controls to the right earbud cable and introduced VoiceOver
functionality for hands-free control.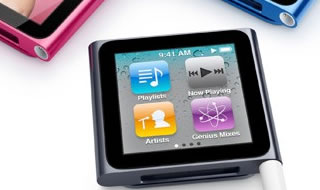 The sixth (and current) generation iPod Nano borrowed elements from 2007's
iteration but it delivered what the third-gen couldn't: a touchscreen. The
device features a 240 x 240 multitouch display and given its 1.47 x 1.61-inch
dimensions, Apple cut its predecessor's camera and video playback, but retained
functionality relevant to active users like the pedometer. Meanwhile, the
fourth-gen iPod Shuffle essentially serves as an entry-level Nano without its
touchscreen interface and accelerometer.
The sixth (and current) generation iPod Nano borrowed elements from 2007's
iteration but it delivered what the third-gen couldn't: a touchscreen. The
device features a 240 x 240 multitouch display and given its 1.47 x 1.61-inch
dimensions, Apple cut its predecessor's camera and video playback, but retained
functionality relevant to active users like the pedometer. Meanwhile, the
fourth-gen iPod Shuffle essentially serves as an entry-level Nano without its
touchscreen interface and accelerometer.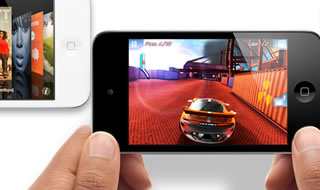 Some three years and four generations after the first touchscreen model, iPod
sales began a noticeable decline -- a fate largely induced by the iPhone and
competing Android handsets. The line between portable music players and
smartphones (especially the iPod Touch and iPhone) has grown incredibly blurred.
Nonetheless, the fourth-gen iPod Touch represents Apple's finest offering to
date with a high-res "Retina" display, Apple's A4 SoC, as well as front and rear
cameras for FaceTime and video recording.
Some three years and four generations after the first touchscreen model, iPod
sales began a noticeable decline -- a fate largely induced by the iPhone and
competing Android handsets. The line between portable music players and
smartphones (especially the iPod Touch and iPhone) has grown incredibly blurred.
Nonetheless, the fourth-gen iPod Touch represents Apple's finest offering to
date with a high-res "Retina" display, Apple's A4 SoC, as well as front and rear
cameras for FaceTime and video recording.