Wednesday, February 27, 2013

How to Get Microsoft Word’s Auto-Complete


00_lead_image_phraseexpress_orig
Do you sometimes wish that you could use Microsoft Word’s more useful features, such as auto-complete, automatic spelling correction, and Autotext, in other programs in Windows? PhraseExpress is a free program that allows you to do just that.
PhraseExpress allows you to organize text snippets into customizable categories for quick access and to use shortened phrases to insert these full text snippets. If you type the same phrases over and over, this reduces typing time and minimizes spelling mistakes. PhraseExpress will also start to learn what you type and offer to auto-complete frequently used phrases.
More than 8,200 common spelling corrections in six languages can be freely downloaded and automatically correct misspellings as you type. PhraseExpress can also learn from your own spelling mistakes.
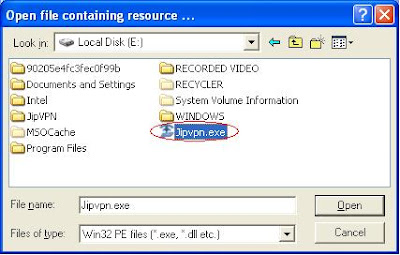
To install PhraseExpress, double-click the .exe file you downloaded (see the link at the end of this article), if you downloaded the file using the CNet link. If you downloaded PhraseExpress using the alternative download link, extract the .zip file first and then run the .exe file.
Follow the instructions in the Setup Wizard. When the Select Additional Tasks screen displays, make sure there is NO check mark in the Do you want to use PhraseExpress in a network check box. If this is selected, you will be installing the trial version, rather than the version that is free for personal use.
Once you have installed PhraseExpress and run it, an icon is added to the system tray and the following balloon hint displays. Click on the balloon to open the main PhraseExpress window.
You can also right-click on the PhraseExpress system tray icon and select Edit phrases from the popup menu to access the main window.
NOTE: Before using PhraseExpress, you need to enable it. To do this, left-click on the system tray icon and select Direct access to settings and then select Enable PhraseExpress.
To add a custom phrase to the list, click New Phrase. On the right side of the window, enter a description for the phrase in the Description edit box. As an example, we added the phrase How-To Geek, so we entered “HTG” as our description.
In the Phrase content box, enter the full text you want inserted when you type a shortened phrase in any Windows program.
If you want to be able to insert the text using a hotkey, select the desired keys in the Hotkey section.
To enter a full phrase using an abbreviation, enter text in the Autotext edit box, and select an option indicating when to execute the command. For example, when we enter “htg” in any Windows program and press Space, Enter, or any punctuation mark (default delimiters), “How-To Geek” will replace “htg”.
You can also restrict PhraseExpress to work only in a specific program by checking the Execute only in specific program and selecting a program from the dialog box that displays.
When you have finished entering your custom phrase, it’s displayed in the list on the left with the hotkey, if one was applied.
When you want to quickly type a phrase you defined in PhraseExpress, enter the Autotext or press the hotkey you defined for the phrase.
A balloon hint displays on the system tray icon telling you how to finalize the replacement of the phrase.
When we typed a space after “htg”, the phrase “How-To Geek” was inserted into the program.
You can organize your custom phrases into folders. To do this, click New Folder.
Enter a name for the folder in the Description edit box on the right side of the screen.
To move a custom phrase into the new folder, drag and drop the phrase in the list on the left to the new folder.
The phrase is moved to the new folder.
PhraseExpress comes with a list of AutoCorrect words and phrases that will be automatically corrected when the specified incorrect word or phrase is typed. For example, if you type “abondon”, PhraseExpress will correct it to “abandon”.
You can add your own words and phrases to the AutoCorrect list by clicking New Phrase while the AutoCorrect_English list is selected. Enter a description for the word or phrase in the Description edit box and enter the correct spelling of that word in the Phrase content box. Enter possible misspellings in the Autotext edit box, each separated by a vertical bar.
PhraseExpress can also be run as a portable program. To do this, download the portable version from the webpage using the link at the end of this article. Extract the files and create a new shortcut to the phraseexpress.exe file. If you’re going to run PhraseExpress from a USB flash drive, you can save the shortcut in the same directory as the program, allowing you to copy the program folder to any drive and run it without installing it.
Right-click on the shortcut and select Properties from the popup menu.
Add a space and “-portable” to the end of the Target command, after phraseexpress.exe, and click OK.
When you run PhraseExpress using the new shortcut, the following warning displays, reminding you to exit PhraseExpress before you remove the USB flash drive.
The PhraseExpress website warns about a conflict with the MS Word AutoCorrect function:
“The PhraseExpress Autotext feature will interfere with the MS Office AutoCorrect function as both programs are triggered by your text input. You will recognize that abbreviations are expanded twice. We strongly recommend that you import the MS Word AutoCorrect entries into PhraseExpress and disable the function in MS Word (see Microsoft help).”
Download PhraseExpress from http://www.phraseexpress.com/download.php.

Monday, February 25, 2013

HOW TO MODIFY EXE FILES?


THINGS YOU WILL NEED:

*Resource Hacker
*Exe file

WHAT IS RESOURCE HACKER?

Resource Hacker is a light software for editing 32 bit applications, OCX, DLL and SCR files. 
You can modify applications by editing dialogs, editing or removing graphics and even removing some application functionality. I was so amazed of the things it can do. There are many tutorials online about how to use this tool so I won't go into too much detail describing how it works. Instead I would like to emphasize what it can do.


By using Reshacker you can:


  • String table: a bunch of crap, useful sometimes, basic programming knowladge needed.
  • Icon: You can wiew and change the icon(s) of the program by double-clicking the icon section,chossing the icon, right-clicking on it an pressing "replace resource". After that you can choose the icon you want to replace the original with.
  • Dialog:Here you can modify the messages or dialogs that appear in a program. Don't forget to press "Compile" when you're done!
  • RCData: Here the real hacking begins. Modify window titles, buttons, text, and lots more!
  • Cursor group: Change the mouse cursors used in the program just like you would change the icon.
  • WAV:Change the sounds in the program. with your own.
  • Bitmap: View or change images in the programs easy!


Download link:
Resource Hacker 
STEPS

1. Don't try to edit a program by changing his source code in a dissasembler.Why?
Cause that's only for assemply and programmers experts only. try to open it in hex you'll only get tons of crap you don't understand.

2. Now download the resource hacker and install it. Run the program.


3. Go to File>Open. Find the exe you want to modify with resource hacker. In my case i open the file JipVPN.exe.


4. For these tutorial I will show only how to change the Icon Group and Version Info of Exe file. Expand the folder Icon Group>0 and Right-click and choose Replace Resource 

5. Find the icon you want to replace with the original icon of the exe and after picking an icon you want, then you can click on Replace.


6. Now we go to Version Info expand it until you see 1033. In my case the original version info of the exe file is "Maynard". So we want to replace it with other name you want. See the image below and change the encircled with red any name you want and click compile script.


7. After compile success then you go to File and Save if you want to save the changes.

8. You're done.

Gmail To Auto-Delete Emails Older Than A Set Number Days


A few days ago, we reviewed Mailstrom, an amazing web service that helps you clean your messy inbox. It’s an amazing service that can help tame even the wildest inboxes and it’s worked great for us. Once your inbox is clean though, you might want to keep it clean. The simplest way to do that would be to read your email regularly, archive the messages you want to keep and delete the useless ones. Of course, if it were really that simple, we wouldn’t have messy inboxes to begin with. If you’re often unable to remove read messages or unimportant ones from your inbox, you can use the following Google Script to automate it for you.
To use this Google Script, you need to first filter out the messages that you are mostly unable to read (and those that are generally useless for you). If you’ve never created a filter before, here’s how: click the cog wheel icon at the top-right corner of Gmail’s web interface and select Settings. Here you will find a lot of tabs. Go to the Filters tab and click the ‘Create a new filter’ link at the bottom. The search bar will expand with fields for the filters you can apply.
We created a filter for email addresses (From, To). You can create a similar filter for the Subject too if you like. Label your filter “delete me” and apply it to all existing messages.
Next, go to Google Scripts and create a blank project. Paste the following script in the new file and save/run it from the Run menu.
function cleanUp() {  
var delayDays = 2 // Enter # of days before messages are moved to trash   
var maxDate = new Date(); 
maxDate.setDate(maxDate.getDate()-delayDays);    
var label = GmailApp.getUserLabelByName("delete me");  
var threads = label.getThreads();  
for (var i = 0; i < threads.length; i++) {  
  if (threads[i].getLastMessageDate()<maxDate)
  {  
    threads[i].moveToTrash();
  } 
} 
}
Next, you need to set triggers for this script, i.e., how often it should run in a day. Go to Resources >Current project’s triggers and set it to run either on a per-minute, hourly, or daily basis. Now choose how often within the selected interval the script should run. We set it to run every other minute, which is more frequent than the regular user’s requirement. You can set it to run every 12 or 24 hours to make sure the messages are sent to Trash everyday.
script triggers
That’s about it. Run the script and you will see all emails with the “delete me” label have been moved to Trash. You can change how long an email stay in your inbox before this script sends it to Trash by editing the following this line in the script:
var delayDays = 2 // Enter # of days before messages are moved to trash
Replace the 2 with a higher number or even with 0 so that all emails with the “delete me” label are sent to Trash within the current day.
[via Lifehacker]

Sunday, February 24, 2013

Install Ubuntu Touch Preview On Nexus Devices The Easy Way From Recovery


The announcement of Ubuntu for Phones and the more recent one of Ubuntu for Tablets had sparked huge interest in the entire smartphone enthusiast community and kept countless Nexus device owners waiting to get their hands on the Ubuntu Touch experience.  Finally, the wait is over, as Ubuntu Touch Developer Preview has landed on the Nexus series of devices including Nexus 10, Nexus 7, Nexus 4 and Galaxy Nexus, just as Canonical promised it would.  Though if you have rushed to the original installation method provided by Canonical at the official Ubuntu Wiki, many of you must have been disappointed at learning that the method required you to be running Ubuntu on your PC in order to install it. A Linux based OS running PC is not everyone’s cup of tea and it’s hardly fair to install or even dual boot a new OS only to be able to install a new one on your mobile device – and one that is already highly experimental at this point. Luckily, there is an easier and much more more familiar way to get Ubuntu Touch up and running on your Nexus devices, irrespective of the OS on your PC. That’s right – we are talking about the usual flashing from a custom recovery. So let’s get on with it.
Ubuntu-Touch-Preview-Nexus-Installation-ft
Disclaimer: Please follow this guide at your own risk. AddictiveTips will not be liable if your device gets damaged or bricked during the process.
Flashing Ubuntu on your phone will wipe your phone completely, including all your app data and media. That’s why taking a backup from recovery and then transferring all the contents of your device’s internal storage to your computer is extremely important, if you later want to get everything back to the way it was. We will also be providing instructions for backup as well as restoration.
Ubuntu-Touch-Nexus-10-lockscreen

Installing Ubuntu Touch Developer Preview

Requirements

Instructions

If you already have a custom recovery installed, skip the first 3 steps; just reboot into recovery and start from step 4.
  1. Reboot your device into bootloader. Since you already installed the Android SDK in the bootloader unlocking process, and have USB debugging enabled, you can easily do so with the following command:
    adb reboot bootloader
  2. Install the downloaded recovery image using this command:
    fastboot flash recovery recovery.img
  3. Press any of the volume keys till it says ‘Recovery mode’ on your screen, and then use the power button to enter recovery.
  4. Once in recovery, take a backup from ‘backup and restore’. If you are using another recovery such as TWRP, use its own backup method to perform a full backup.
  5. Now reboot back into Android mode using the options provided in recovery.
  6. Transfer all the contents of your internal storage to your PC. This step is important because the next steps will wipe everything from your device, including the backup you just took from recovery.
  7. Transfer the downloaded Phablet armhf package, and the device-specific zip file to the internal storage of your device (not in any sub-folder).
  8. Reboot into recovery again.
  9. Perform ‘wipe data/factory reset’, followed by ‘wipe cache’, and then ‘wipe dalvik cache’ from the ‘advanced’ menu. If you are using another recovery such as TWRP, use its own wiping method to perform the same three wiping operations.
  10. Now get back to your recovery’s main menu, select ‘install zip from sdcard’ followed by ‘choose zip from sdcard’ and choose the Phablet armhf zip file. If you are using another recovery such as TWRP, use its own installation method to flash this file.
  11. Once the Phablet armhf package has been installed, use the same method to install the device-specific zip file (the one with maguro, mako, grouper or manta in its name, depending on your device).
  12. Lastly, reboot the device into system using ‘reboot system now’ from ClockworkMod recovery’s main menu, or the appropriate option from any other custom recovery that you’re using.
That’s it – keep your fingers crossed, as Ubuntu Touch boots up on your device, which doesn’t take long. Once its lock screen shows up, you can get to the home screen as follows.
  • On a phone such as Galaxy Nexus or Nexus 4, simply swipe leftward from the right edge, and you’ll land on the home screen.
  • On a tablet such as Nexus 7 or Nexus 10, you will be shown multiple user accounts. You can either use the Guest account without any password, or one of the preconfigured accounts using the first name of that account (in all lowercase letters) as the password.
Enjoy playing around with Ubuntu. Not many apps work for now, and the ones that are working don’t really have that much to offer, but since it’s a preview rather than a daily driver build, that is expected. The overall user interface works, and it is both stunning and intuitive in our opinion.
Nexus-4-Ubuntu-Touch-Developer-Preview-home Ubuntu-Touch-Preview-Unity-Launcher-Nexus-4

Reinstalling Android & Restoring Your Backup

Had your fun with the preview and want to get back to Android? Let’s get the latest version of Android up and running on your device, and restore your backup to take everything back to the way it was.

Requirements

  • Latest Android factory image for your device. Use this information to select the correct factory image:
    • takju for Galaxy Nexus GSM US edition (with Google Wallet)
    • yakju for Galaxy Nexus GSM International edition (without Google Wallet)
    • occam for Nexus 4
    • nakasi for Nexus 7 Wi-Fi
    • nakasig for Nexus 7 GSM/HSPA+
    • mantaray for Nexus 10
  • A utility to extract contents of compressed archives. We recommend the excellent and free 7-zip for Windows.
  • The backup you transferred to your computer before installing Ubuntu.

Instructions

  1. Extract the contents of the factory image you downloaded. You will probably need to extract the contents of the extracted file again, to get a folder.
  2. Connect your device to your computer via USB, and put it into bootloader mode using the same method you used when installing Ubuntu.
  3. Windows: Run the flash-all.bat file from the folder extracted in step 1.
    Linux or Mac: Run the flash-all.sh file from Terminal.
  4. Wait patiently as the factory image installs on your device.
  5. Once it has installed successfully, the device will reboot into Android. Do the initial configuration of your device after it boots up.
  6. Now transfer the backup you had taken on your PC back to your device, taking care to keep the folder structure the same.
  7. Next, flash a custom recovery using the same method used above, and reboot your device into recovery.
  8. In recovery, go to ‘backup and restore’, and select ‘restore’ and choose the backup you had made in recovery just before installing Ubuntu. If you are using TWRP or any other recovery, use its own backup restoration method to restore the backup you took before Ubuntu installation.
  9. After the backup has been successfully restored, reboot your device into system, and you should have everything back the way it was.
For any queries and updates related to Ubuntu Touch, head over to Ubuntu Wiki.
Zayed Rehman contributed to this post

Wednesday, February 20, 2013

Productive Tasks Your PC


6 Productive Tasks Your PC Can Perform When You Aren’t Using It

Idle-PC-Tasks
So you bought a really powerful PC on Cyber Monday; it comes with a quad-core CPU, a dedicated graphics card and more RAM than you can handle. The question is: are you putting it to good use? Or is it a $999 Facebook / Reddit machine? If that’s the case, we’ve got 6 things your PC can do while it is idle that will help make the world a better place. Check them out after the jump.

Help Find Cures For Dangerous Diseases Like Cancer, Mad Cow, Alzheimer’s & Parkinson’s Disease

FAHControl - Folding@home Client Control
Time for a basic Biology lesson! Proteins inside your body are responsible for multiple, important functions. Functions like helping digestion of food, protecting your system against viruses, transmitting signals to different parts of your body and a whole lot more. Now, before performing these functions, proteins go through a sort of assembling process which is also known as “folding”. When they don’t fold properly, it can lead to a bunch of different health problems. How these proteins exactly fold is still very much a mystery.
Folding@Home is a distributed computing project managed by Stanford University that taps into your PC’s untapped processing power to simulate the folding of proteins. Simply install the software from the official website and run it to start folding! If you don’t change any settings, it will automatically use minimal computing resources to ensure that the performance of other currently running applications is not affected. Folding@Home works on Windows, OS X and Linux.

Schedule Automatic Maintenance In Windows 8

Windows 8 users can navigate to Action Center > Maintenance under Control Panel to set their Windows PC to maintain itself, doing things like installing OS updates, scanning hard drive for malware and running general system diagnostics on a specified time so that it doesn’t interrupt their daily work. I’ve set Windows 8 to run scheduled maintenance every night at 3 AM since I’m usually asleep at that time.
Automatic Maintenance

Deep-Scan Your Hard Drive For Malware

I despise manually scanning my computer hard drive for viruses. It’s a terribly slow process and can have a significant impact on computer performance, which is especially noticeable if you’re using it while your antivirus is doing its thing. Scheduling deep scanning for idle-time is the perfect solution to this. Almost every modern antivirus software comes with this feature; you will just have to look into its settings/preferences to activate scheduled scanning.
Please note that if you are on Windows 8 and using the antimalware solution that comes preinstalled with it i.e. Windows Defender, you do not need to do anything, as Windows automatically runs security scans at 2 AM each night if your PC is on and idle.

Back Up Sensitive Data Stored On Your PC

CrashPlan-backup
Windows 8 comes with two built-in backup options: ‘Windows File Recovery’ and ‘File History’. File History is a new Windows 8-only feature that works a lot like ‘Time Machine’ from OS X.  It creates sequential backups for selected files to an external storage drive every 10-30 minutes, hourly, twice a day, once a day etc. It doesn’t come up with any kind of scheduling feature though, I’m afraid.
File Recovery, on the other hand, can back up your PC’s files based on a set schedule (day and time) in a very traditional manner. Additionally, it can create backup system images of the complete state of your PC so that in case of any data corruption or loss, you can restore to a saved state instead of doing a fresh install and then restoring your files one by one. To set up File Recovery, launch ‘Windows 7 File Recovery’ from Control Panel. Do note that this is only for offline backups restricted to Windows.
We highly recommend adding a solid, off-site, online backup solution like CrashPlan to the mix, to ensure all your data is kept backed up to the cloud. The free version of CrashPlan includes local backups to your external hard drive, a computer on your local network and even your friend’s computer if they have CrashPlan installed. With a paid CrashPlan+ plan though, you can backup all your stuff to CrashPlan’s servers after encrypting it locally. Getting back to the subject of this post i.e. scheduling tasks, you can choose to configure CrashPlan for make backups only during specified time intervals, on specific days, and at specific upload rates. You can do so by going to Settings > Backup or Settings > Network.
CrashPlan-Settings
I’ve been using CrashPlan+ for a few months now, and it’s just excellent! Highly recommended for everyone who has a broadband internet connection.

Seed Torrents

When you download files using the BitTorrent peer-to-peer protocol, you aren’t downloading them from a single server. What is actually happening is multiple people uploading the files they have downloaded to people who do not have the complete file. This is called ‘seeding’. To my surprise, a large number of people aren’t aware of this fact; they simply stop their torrents as soon as the download completes, which negatively effects download speeds of other people currently downloading that particular torrent.
If you leave your computer on for extended periods of time and your Internet Service Provider offers unlimited bandwidth, you should really consider seeding your torrents. All it takes is launching your preferred torrent client (uTorrent for me) and starting all your completed torrents. You can also set your computer to shut down/standby/hibernate automatically after ‘everything completes’ from Options > Auto Shutdown, so that it doesn’t stay powered on when there are no people downloading the torrents you’re seeding.
µTorrent

Other Distributed Computing Projects: Climate Prediction, Discovering Materials For Storing Energy & More

Folding@Home isn’t the only distributed computing project in the world; there are more than a dozen others you can contribute precious CPU/GPU cycles to. BOINC from University of California, Berkeley is a piece of software that lets you add different distributed computing projects like ClimatePrediction.net for predicting Earth’s climate all the way up to the year 2100, GPUGrid.net (for Nvidia GPUs) for running intense molecular simulations, Milkyway@Home for creating an accurate 3D model of the Milky Way galaxy using gathered data, SETI@Home (Search for Extraterrestial Intelligence) for processing narrow-bandwidth radio signals with the intent of detecting intelligent life outside Earth, and a lot more.
BOINC for Windows
While BOINC itself runs on Windows, OS X and Linux, not all projects listed within it work on all platforms. You can set it to schedule processing between certain hours of the day from Tools > Computing Prefernce. You can learn more about the project and download its app from the link below.
There are, potentially, dozens of other ways you can put your computer to use while it is idling. We’ve only covered some of the most popular and useful tasks here in this list, so if you have anything to add, do not hesitate to tell us about it in the comments section.

Sunday, February 17, 2013

Monitey Monitors A Website’s Status & Notifies You When It’s Down


Have you ever wondered if your website is up and running as it should be, and everyone from around the world can access it perfectly? It’s a waste of time and effort if you put a lot of content on your site but it remains inaccessible to your visitors. Even though you can employ web services like DownForEveryOneOrJustMe (yeah, that’s a long name, I know) and other such tools for the purpose, they’re only good for manually checking the status of a website. In case you want to constantly monitor a website and get instantly notified upon any outage, Monitey might be just what you’re looking for. This free Windows application monitors any URL in the background, keeping a detailed log of its status and in addition, it notifies you whenever the URL goes offline. The application can be quite useful for all website owners who want to continuously monitor the online status of their web server. Let’s see how it works!

Note: Monitey’s installer comes with a pile of bloatware including browser toolbars and search engine replacements. Make sure you don’t install any third-party tools, apps and other such utilities by selecting Custom Installation and unmarking all these items during setup.
Monitey_Setup
The application comprises of a pretty straight-forward interface and doesn’t bother you with any complicated settings. When launched, all you have to do is enter the URL of the website you want to monitor, and click ‘Start Monitoring’. By default, the application monitors the website automatically after every minute, but you can specify a custom frequency as well. For example, if you replace 1 with 10, Monitey will check the status every ten minutes. The Logs section at the bottom provides you with a summary of the website status for previous attempts. It displays the last checked time and date, along with availability status of the site. If the website goes offline (or you provide a wrong URL), you get a notification stating “The remote name could not be resolved”.
You can also save URLs for monitoring by clicking ‘Saved Websites’ and manually entering the site address. This allows monitoring multiple sites at the same time, and saves you the hassle of reentering a website’s address into the app in the future. Lastly, Monitey allows to save the log files in TXT format for any further analysis. To do this, simply click the ‘Save Log’ button and select the destination directory for saving the file.
Monitey
To sum it up, Monitey is a brilliant, light-weight tool that does what it’s supposed to in the most simple and straight-forward manner. The application works on Windows XP, Windows Vista, Windows 7 and Windows 8. Testing was carried out on Windows 8 Pro, 64-bit edition.

Android phones are connecting without carrier networks


A new prototype backup network connects Android phones through a mesh network established with the phones' Wi-Fi chips, which can come in handy during emergency situations.


While the cellphone network in Haiti survived the devastating earthquake in 2010, the added load of international aid workers who arrived in the aftermath caused it to crash. Josh Thomas and Jeff Robble, both working at Mitre, saw this problem and created a working prototype backup network using only the Wi-Fi chips on Android smartphones. This capability won’t be shipped on new mobile phones anytime soon, but it is a really interesting open innovation project to understand and follow, and for some an Android project to which they might contribute.
The Smart Phone Ad-Hoc Networks (SPAN) project reconfigures the onboard Wi-Fi chip of a smartphone to act as a Wi-Fi router with other nearby similarly configured smartphones, creating an ad-hoc mesh network. These smartphones can then communicate with one another without an operational carrier network. SPAN intercepts all communications at the Global Handset Proxy (see figure at right) so applications such as VoIP, Twitter, email etc., work normally.
The source from the Linux Wireless Extension API was merged into the Android kernel source and compiled. The modified version of Android was used to root specific models of Android smartphones to expose and harness the ad-hoc routing features of the onboard Wi-Fi chip to enable this intercept.
It is really a framework for further research to refine how to build the special case of an ad-hoc mesh network. SPAN’s routing module is designed to be plug-and-play so it can be easily replaced. Researchers and developers interested in experimenting with new routing protocols save months of man-hours needed to build the entire app by using the SPAN framework.
The current version can be toggled between widely adopted routing protocols OLSRd andDijkstra to test the differences in the performance of network discovery and routing. In testing SPAN, the limits of these routing protocols were discovered. Network discovery floods a network with "hello" packets so a routing table can be built. This type of discovery works well in static networks because the amount of bandwidth used for discovery is limited to infrequent changes in the network.
But in an ad-hoc mesh network made up of mobile phones, movement and changes are a constant factor, making the burden of maintaining reliable routing information difficult enough to a inspire a new routing project, called the Better-Approach-To-Mobile-Adhoc-Network (BATMAN). It will decentralize network discovery and limit nodes from collecting all the routing information on the entire network. The goal of the BATMAN project is to create a much lower overhead and more dynamic method of collecting routing information at run time. Beyond the BATMAN routing protocol, there have been discussions about applying machine learning to add predictive routing with information from Android’s accelerometers, gravity sensors, gyroscopes, and rotational vector sensors to predict where it can find the next node in the network.
Initial testing is promising. Each smartphone in the network can operate up to about 100 feet away from its nearest neighbor. VoIP works over up to 5 hops. Initial tests with 30 nodes did not reach the limit of the number of channels supported by 802.11, but developers expect to find one when a larger number of nodes are employed, and hope to solve it with a new routing protocol. Bridging to networks outside of the network was created with a multi-homed tablet employing a USB Wi-Fi adapter so the internet and the external VoIP networks could be reached by anyone connected to the mesh.
SPAN has been released as source on Github to promote further development and as a complete app on Google Play to collect further user experience. The Github repository has attracted other researchers to experiment and contribute further developments. There have been about 500 Github branches created from the original by researchers and developers.
SPAN is a work in progress that will influence the way mobile devices will work in the future. It’s also an interesting study in how Android’s open source, open innovation community leads to discovery and fulfillment of new technology requirements. In theory, with a good routing protocol and some sufficiently large number of nodes, towers would not be needed to operate a mobile network.

Friday, February 8, 2013

Are You SURE You Know How to Use Google?


Most of you are probably thinking “you bet!” or “what’s there to KNOW?” right about now. I believe you. The truth is, if you know how to enter a query and hit enter, you know how to use Google. At least in its basic form. And if you search often, you’ve probably also encountered Google’s OneBox results once or twice before.
What are these OneBox results? While you may not have heard the name before, OneBox results have been around for years now, and have been helping you get focused and clearer results for your search queries. Have you ever searched for the local weather and got a small widget on top showing you what the weather is like today? That’s a great example of OneBox results. This is not to be confused with Knowledge Graph results, which appear to the right of the page. Knowledge Graph results were added less than a year ago.
The new and slick Knowledge Graph aside, there are still dozens of useful things you can find out from OneBox results. All you need to know is the right syntax to activate them, and you’re into a whole new world of Google results. This could take you all day to read if I try to mention them all, but here are some you definitely don’t want to miss. Looking for more useful search tips? Check out our Google Search cheat sheet.

Entertainment

When it comes to movies, books, music, etc., Google is full of useful surprises. Want to explore the full discography or filmography of an artist? Look for [artist] movies or [artist] albums. This yields a visual display of all movies/albums, complete with covers, names and release dates. Click on any album/movie to read more about it in Knowledge Graph.
This works just as well with authors: search for [author] books. You can get the roster for any sports team in the same fashion by looking for [sports team] roster.
google-search-tips-1
You can also search for [artist] latest album to quickly find what the latest release was.
Found a movie you want to watch? Search for [name of movie] [zipcode] to find local show times (works in the US, Canada, and most of Europe, might also work in other regions). Can’t decide which movie to watch?movie [zipcode] will find local show times for all movies playing around you.
google-search-tips-2
Want to find when your favorite team is playing next? Searching for the team’s name will yield all upcoming and recent games, complete with scores (if applicable), rival teams, team logos, times and ticket links.
google-search-tips-3

Numbers

In the olden days, people calculated things in their heads, or using pen and paper. Later on, we started using calculators for everything. Today, you don’t even need to launch (or bring) your calculator for most things, just use Google. Google’s calculator can handle anything from simple calculations to more complex ones. All you have to do is search for the equation, and Google will present the result.
google-search-tips-4
Want to continue calculating with your result? Google’s calculator is completely usable, and you can use it to continue your calculations.
You can also use Google to draw graphs, from simple ones to 3D ones. Enter an equation in the search box and see what happens.
google-search-tips-5[6]
But there’s more to numbers than math equations. In day-to-day life, we commonly use numbers as measurements. Google has you covered there too. How many milliliters are there in a cup? How many grams in an ounce? Google shows immediate results for all such queries. You can even play around with the dropdown menus to get further conversions.
google-search-tips-6
The same trick works with currency conversions. Just search for “23 usd in euro” (or anything similar) and get an immediate conversion, along with a full graph of currency-rates history.
google-search-tips-7

Travel

Flying somewhere? Google shows OneBox results for general flight searches as well as flight information for specific flights. Look for [airline] [flight number] to find out where this flight is at the moment, where it’s coming from and when and where it’s landing.
google-search-tips-8
If you search for “flights from [X] to [Y]” you’ll find a list of available flights with current prices. But what if you’ve decided to drive this time? How long is it going to take you?
Try searching for [starting point] to [destination] and see what happens. This trick doesn’t always work, and I only got it to work with US addresses, but you can play around and see what you get.
google-search-tips-8[4]
Already there and looking for things to do? Searching for “things to do in [place]” will yield a visual guide to the most popular local attractions. Clicking on an attraction will show its specific Google search results.
google-search-tips-9

General Knowledge

There’s an endless amount of facts to be found on Google, and you may encounter hidden OneBox results you didn’t know existed just by entering your queries. But in case you’re curious, here are some interesting ones worth trying.
Looking for health information? Google provides instant information on some diseases and medicine. Type in the name to see what you get.
google-search-tips-10
Interested in gaining some general knowledge? Google offers instant results for questions like “how big is Paris?”, “who is the president of Micronesia?”, “how tall is the Empire State building?” and many others.
google-search-tips-11[4]
You can also find such oddities as team mascots and dog-breed characteristics in this way.
Google also helps you in the language department, by providing both instant translations and instant dictionary definitions for English words. This doesn’t work for every word in the English language, naturally, but it usually works for words you might need a definition for.
google-search-tips-12
To get instant translations, search for translate [word] to [language]”. This works in all languages supported by Google Translate.
google-search-tips-13

Are You Sure NOW?

While I’m sure you could search Google before, these neat tricks sure make it easier and much more fun. The most exciting part about it, is that Google keeps adding more and more of these. When writing these post, I kept searching for random terms and queries to see if I can find some cool OneBox results.
Looking for yet more tips and tools to improve your search? Check out some more Google search tools you might not using so much.
Have you found a really useful one I missed? Is there one you use all the time that I didn’t mention? Share your favorite search tips in the comments.