Showing posts with label Hacking. Show all posts

Saturday, July 13, 2013

How to Make Your Own Windows Registry Hacks

Over the years, we’ve created many Registry hacks to customize and tweak your Windows computer. Today we’re going to give you the keys to making your own registry hack files that you can use on any computer.
Before we go further, it’s worth noting that even reading this article and thinking about the registry will make your computer melt, and we’re not responsible if you break stuff, which… you will.

So what is a Registry Hack?

Whenever you customize a key or value in the registry, you could arguably call it a registry hack… but in this context, we’re referring to those downloadable registry hack files with the .reg extension that do magical things to your computer. Like break it. Be afraid.
In simpler terms, a registry hack file is a backup of all the changes that you’ve done to your registry, saved in a file so that you can apply those same changes to your computer should you reinstall, or on another computer when you get a new one.
If you want some examples of registry hacks, flip through and read some of the ones we’ve covered over the years:
If you’re really determined to continue reading, please proceed. Just don’t blame us if your computer breaks.

Making a Registry Hack

Once you’ve mucked around and changed the Registry values to your liking, you’ll want to use the Export feature to save everything out into a text file with the .reg extension — otherwise known as a registry hack file. These files follow a standard format, so you could probably create them from scratch if you really wanted to, but when you can export directly from the Registry Editor, why bother?
When exporting keys, you should make a point of drilling down to the lowest level on the left-hand side that you can get to while still seeing the value on the right-hand side that you’re trying to save into a file. Then right-click, choose Export, and then save it somewhere.
Now that you’ve successfully saved the file, you can either double-click it to merge the values back into the registry, which wouldn’t make sense right now, or copy it to another computer and merge the values into the registry, which would set the same values.
And in the case of this particular registry hack, that would work just fine because there is only a single value on the right — but most of the time, you’re going to need to edit the file. So right-click on it and choose Edit to open in Notepad.
And now we see the registry hack format, which is pretty simple, but requires a little explanation. Every registry hack contains this line at the top, which identifies it as a registry hack — without this line, it’s not going to work right.
Windows Registry Editor Version 5.00
You only need this line once in the file, and it must be the very first line. If you’re trying to combine more than one registry hack, keep that in mind — you only want it at the top line, once.
The next section can be as long or as short as your registry hack needs to go, and is arranged into sections for the Keys (the stuff on the left-hand side of the Registry Editor) and then a set of values for that key. For instance, if you had two keys that you wanted to set values for, you could have them each in the file like this — the SomeVariableName would be the value on the right-hand side under the SOMEKEYHERE that is on the left-hand side — and SomeValue would be underneath ANOTHERKEY.
[HKEY_LOCAL_MACHINE\SOFTWARE\SOMEKEYHERE]
"SomeVariableName"=dword:00000000

[HKEY_LOCAL_MACHINE\SOFTWARE\ANOTHERKEY]
"SomeValue"=dword:00000001
We should really give you an example where you need to do some editing, what we’ll do is open up the Registry Editor and browse down to the following key on the left-hand side. This key determines whether User Account Control blacks out the rest of the screen when the popup shows up, but that’s not important now.
HKEY_LOCAL_MACHINE\SOFTWARE\Microsoft\Windows\CurrentVersion\Policies\System
Now go ahead and Export from the System key on the left-hand side, since that’s the lowest we can drill down while still seeing the key on the right. Open up the registry hack file and you’ll see a whole bunch of different stuff in it — yes, our PromptOnSecureDesktop is there in the file, but what about all the other stuff?
If you were to take this registry hack file to another computer and import it, everything else that was set on this machine underneath that Key… would end up being set on the new computer. For instance, the EnableLUA key that you see in the file? That disables or enables UAC depending on how it is set. So if you just wanted to set the Secure Desktop value and didn’t want to change UAC on the other computer, you could inadvertently change that value too — along with everything else in the file.
Luckily there is a very simple answer: it’s a text editor! Just delete everything that isn’t the value or values you want to set. In our case we’ll delete everything but this single value, but if you had five settings in here you wanted to change, you could leave all five of them.
The important thing is that you don’t delete the first line, and you don’t delete the [HKEY_LOCAL_MACHINE\SOFTW....etc] line right above the value, because the Registry Editor needs to know where to put the value.

Combining Registry Hacks Together

Remember that first example with the NoAutoReboot stuff? That’s one of my favorite registry hacks. Now what if we wanted to include that one in our registry hack file along with the Secure Desktop stuff? Luckily, it’s simple, you just have to remember the rule: the Windows Registry Editor Version 5.00 line… only goes in the file once, at the top.
So if you copy and paste the two files into each other, and make sure that top line is only in there once, you’ll end up with a registry hack that contains both settings.
And you can do this as many times as you want — if you want to put every single tweak that you’ve ever done into a single file so that you can use it every time you reinstall, we’d be interested to hear about it.

Deleting a Registry Value

And now, the thing they don’t teach you in school… how to delete a registry value.
There are some scenarios where a registry hack entails creating a new key that didn’t exist before, and changing the setting back requires deleting that registry key. The way this works in registry hack land is pretty simple:
Export the key and change the value that it is set to so that it is just a minus sign. For instance:
“NoAutoRebootWithLoggedOnUsers”=dword:00000001
Would become…
“NoAutoRebootWithLoggedOnUsers”=-
Not terribly hard once you do it once.
So what if you wanted to delete the registry Key instead of the value? You know, the stuff on the left-hand side of the Registry Editor? Again, it involves a minus symbol placed into a registry hack file. So if you wanted to delete the entire key shown in the above screenshot, you’d change it from this:
[HKEY_LOCAL_MACHINE\SOFTWARE\Policies\Mic...]
To this:
[-HKEY_LOCAL_MACHINE\SOFTWARE\Policies\Mic...]
See that little minus sign? That will tell the Registry Editor to completely delete that key, and every value underneath it.
You should use this with great caution. With great power comes greatly messed up computers when you screw up. In fact, you shouldn’t be doing any of this. Give me back the keys!

Monday, April 15, 2013

Fix For Recent WordPress Brute Force Attack Is Easier Than You Think


Fix For Recent WordPress Brute Force Attack Is Easier Than You Think
Over the past couple of days it has been widely reported that WordPress based sites are being targeted by a massive brute force attack, one that is supposedly backed by a botnet with over 90,000 IP addresses. The nature of this attack has been described as being much larger than usual, with CloudFlar alone blocking over 60 million requests in under one hour. The attack is believed to be on a global scale, affecting almost every web host out there. So naturally WordPress users have been looking for a fix, which is surprisingly easy, this coming from the man himself who made WordPress.
What has puzzled site owners and hosts alike, is that there seems to be no clear reason for this global attack. The attacks seem to be sourced from PCs, which are capable of installing a backdoor that would allow hackers to control the site from anywhere in the world. Matt Mullenweg, the creator of WordPress, released a statement and detailed a very easy fix, one that would keep sites almost 99% ahead of those who are not on the same track.
Almost 3 years ago we released a version of WordPress (3.0) that allowed you to pick a custom username on installation, which largely ended people using “admin” as their default username. Right now there’s a botnet going around all of the WordPresses it can find trying to login with the “admin” username and a bunch of common passwords, and it has turned into a news story (especially from companies that sell “solutions” to the problem).
Here’s what I would recommend: If you still use “admin” as a username on your blog, change it, use a strong password, if you’re on WP.com turn on two-factor authentication, and of course make sure you’re up-to-date on the latest version of WordPress. Do this and you’ll be ahead of 99% of sites out there and probably never have a problem. Most other advice isn’t great — supposedly this botnet has over 90,000 IP addresses, so an IP limiting or login throttling plugin isn’t going to be great (they could try from a different IP a second for 24 hours).
You heard the man! Implementing this easy fix would ensure a relatively high level of safety for a WordPress based site. Hopefully security researchers will be able to dig deeper and find out what really is the reason behind this global WordPress brute force attack.

Wednesday, March 20, 2013

PSSP Is A Full-Featured PSP Emulator For iPhone


Some people argue that handheld gaming devices don’t have much of a future due to the constant progress smartphones are making. There can be no denying the fact that modern smartphones offer a huge variety of titles, but those who prefer quality over quantity still go for the likes of PlayStation Portable or Nintendo 3DS. A lot of people are sure to appreciate a way of combining the positive points of smartphones and handheld gaming devices. PPSSPP doesn’t exactly do that, but it comes pretty close. This PSP emulator has been around on Android and Windows for quite a while now, but has just arrived on iOS. As you can imagine, the app is available as a Cydia download, since Apple isn’t likely to allow such a thing to appear in the App Store. PPSSPP can be deemed a work in progress, but some PSP games that are fully compatible with it look pretty awesome on the iPhone.

Installation

PPSSPP isn’t available at any of the default repositories yet, and you will have to add the following repo to Cydia in order to install it.
http://cydia.myrepospace.com/theavenger
Once the resources have been refreshed properly, search for PPSSPP. Now you can install the emulator just like any other Cydia app.

Using PPSSPP

To get started, dump a PSP game onto the memory card to make an ISO out of it. You can look around on the internet for instructions; the process isn’t as complicated as it sounds, as long as you have the UMD of the game you want to play on your iPhone.
Once the ISO has been extracted, you need to copy it to your iDevice’s file system using WinSCP or iFile. The game needs to be placed at the following location.
/var/mobile/Documents/Download
Now you are all set to play your favorite PSP game on your iPhone.
PPSSPP iOS Home PPSSPP iOS Settings
Launch the app and adjust its settings to suit your requirements. From the emulator’s settings, it is possible to toggle sound, tinker with control options and change other visual aspects of the screen. As warned by the developer, changing some of the settings might cause your device to restart.
PPSSPP iOS Load PPSSPP iOS Game
Once the settings are all good to go, it’s time to load the game you copied to your device earlier. Hit the ‘Load’ button from the app’s home screen, and make your way to the game’s location in the file system where you placed the ISO file. Tap the file’s name, and watch PPSSPP work its magic. If you have an old iDevice, loading a game is likely going to take ages. The smoothness of the entire operation also depends upon the game you choose; not all games are compatible with PPSSPP for now, but the official site of the emulator has a complete list of games that play nice with the app.
The default controls in PPSSPP include four arrow keys, start/select buttons, four option keys, a button to bring up developer options and right/left joystick fire keys.
PPSSPP is a free and open-source app; do give it a try if you are a fan of PSP and want to see how it will look on your iPhone or iPod touch’s screen.

Monday, February 4, 2013

iOS application security assessment: Sqlite data leakage


Most of the iOS applications store sensitive information like usernames, passwords & transaction details, etc.. either permanently or temporarily on the iPhone to provide offline access for the user. In general, to store large and complex data, iOS applications use the Sqlite database as it offers good memory usage and speed access. For example, to provide offline access Gmail iOS application stores all the emails in a Sqlite database file in plain text format.

Unencrypted sensitive information stored in a Sqlite file can be stolen easily upon gaining physical access to the device or the device backup. Also, if an entry is deleted, Sqlite tags the record as deleted but not purge them. So in case if an application temporarily stores and removes the sensitive data from a Sqlite file, deleted data can be recovered easily by reading the Sqlite Write Ahead Log. The below article explains on how to view Sqlite files and how to recover the deleted data from Sqlite files on the iPhone. For this exercise, I have created a demo application called CardInfo. CardInfo is a self signed application, so it can only be installed on a Jailbroken iPhone. The CardInfo demo application accepts any username & password, then collects the credit card details from the user and stores it in a Sqlite database. Database entries are deleted upon logout from the app.

Steps to install the CardInfo application:
  
1. Jailbreak the iPhone.

2. Download CardInfoDemo,ipa file - Download link.

3. On the Windows, download the iPhone configuration utility – Download link.

4. Open the iPhone configuration utility and drag the CardInfoDemo.ipa file on to it.


5. Connect the iPhone to the windows machine using USB cable. Notice that the connected device is listed in the iPhone configuration utility. Select the device and navigate to Applications tab. It lists the already installed applications on the iPhone along with our CardInfo demo app.


6. Click on Install button corresponding to the CardInfo application.

7. It installs the CardInfo application on to the iPhone.


When an application is installed on the iPhone, it creates a directory with an unique identifier under/var/mobile/Applications directory. Everything that is required for an application to execute will be contained in the created home directory. Steps to view CardInfo Sqlite files: 1. On the Jailbroken iPhone, install OpenSSH and Sqlite3 from Cydia.
2. On windows workstation, download Putty. Connect the iPhone and the workstation to the same Wi-Fi network.
 

Note: Wi-Fi is required to connect the iPhone over SSH. If the Wi-Fi connection is not availableSSH into the iPhone over USB.

3. Run Putty and SSH into the iPhone by typing the iPhone IP address, root as username and alpine
as password.

4. Navigate to /var/mobile/Applications/ folder and identify the CardInfo application directory using
find . –name CardInfo’ command. On my iPhone CardInfo application is installed on the - /var/
mobile/Application/B02A125C-B97E-4207-911B-C136B1A08687/
 directory.


5. Navigate to the /var/mobile/Application/B02A125C-B97E-4207-911B-C136B1A08687/
CardInfo.app
 directory and notice CARDDATABASE.sqlite3 database file.


6. Sqlite database files on a Jailbroken iPhone can be viewed directly using Sqlite3 command line
client. View CARDDATABASE.sqlite3 and notice that CARDINFO table is empty.


7. On the iPhone, open CardInfo application and login (works for any username and password).

8. Enter credit card details and click on Save button. In the background, it saves the card details in
the Sqlite database.


9. View CARDDATABASE.sqlite3 and notice that CARDINFO table contains the data (credit card
details).


10. Logout from the application on the iPhone. In the background, it deletes the data from the Sqlite
database.


11. Now view CARDDATABASE.sqlite3 and notice that CARDINFO table is empty.

Steps to recover the deleted data from CardInfo Sqlite file:

Sqlite database engine writes the data into Write Ahead Log before storing it in the actual database file, to recover from system failures. Upon every checkpoint or commit, the data in the WAL is written into the database file. So if an entry is deleted from the Sqlite database and there is no immediate commit query, we can easily recover the deleted data by reading the WAL. In case of iOS, strings command can be used  to print the deleted data from a Sqlite file. In our case, running ‘strings CARDDATABASE.sqlite3’ command prints the deleted card details.


In iOS, if an application uses the Sqlite database for temporary storage, there is always a possibility to recover the deleted temporary data from the database file.
For better security, use custom encryption while storing the sensitive data in Sqlite database. Also, before deleting a Sqlite record, overwrite that entry with junk data. So even if someone tries to recover the deleted data from Sqlite, they will not get the actual data.

Sunday, January 20, 2013

How To Use Google Chrome For Hacking?


Up till now, firefox was widely used by hackers and pentesters for their day to day job due to tremendous plugins that would make their work much easier for them. However now a days i prefer google chrome more than firefox, due to wide variety of interesting extensions that may provide a great aid in hacking and pentration testing.

Their are lots and lots of google chrome extension that can be used for hacking, however i have complied a list of my favorite ones, which i use frequently in order to test different types of web applications for security vulnerabilities.

How To Use Google Chrome For Hacking - Extensions

XSS Rays

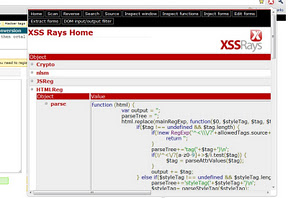
Xss rays would certainly be at the top of my list,  XSS rays includes a scanner, XSS reverser and a DOM inspection tool. Although it does makes the browser a bit unstable when you are performing heavy scans, However it's really handy in detecting XSS attacks. It's a perfect replacement to XSSME that is used in firefox for detecting XSS attacks.

Official Description

XSS Rays is a security tool to help pen test large web sites. It's core features include a XSS scanner, XSS Reverser and object inspection. Need to know how a certain page filters output? Don't have the source? No problem. XSS Rays will blackbox reverse a XSS filter without needing the source code.

Websecurify Scanner

Websecurify Scanner is a really powerful scanner capable of detecting lots of web application attacks. Although it generates lots of false positives, mostly related to CSRF attacks. However it's really handy in detecting XSS attacks. It's fully awesome automated and very user friendly.

Usage

1. All you need to do is to install the websecurity scanner from the link above and visit the following page:

https://suite.websecurify.com/foundation

2. Just enter the URL and it will automatically start scanning.


HPP Finder

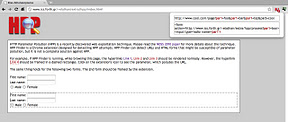
HPP finder is capable of easily detecting Http Parameter Pollution attacks. HTTP Parameter Pollution is newest type of web application attacks, Their is not very much information available on it as compared to other attacks such as XSS, SQL injection. However the one that's available is very handy.


Official Description

HTTP Parameter Pollution (HPP) is a recently discovered web exploitation technique. Please read the NDSS 2010 paper for more details about the technique. HPP Finder is a Chrome extension designed for detecting HPP attempts. HPP Finder can detect URLs and HTML forms that might be susceptible of parameter pollution, but it is not a complete solution against HPP. 

XSS CHEF

XSS Chef is a perfect replacement to BEEF (Browser Exploitation Framework) for google chrome, XSS chef will ease your exploitation process. I will write a complete tutorial on it.


Cookie Editor


Cookie Editor is a very useful google chrome extension for hackers, I mostly use it, when i am performingsession hijacking attacks.


I hope you have liked my list of favorite google chrome extension for hacking, Depending upon the response, If i get more than 25 comments on this post, I will write up a part 2 of this post "How To Use Google Chrome For Hacking".

Feel free to ask, if you have any questions.

Saturday, January 19, 2013

New SSL/TLS attack for Hijacking HTTPS Sessions


CRIME : New SSL/TLS attack for Hijacking HTTPS Sessions

Two security researchers claim to have developed a new attack that can decrypt session cookies from HTTPS (Hypertext Transfer Protocol Secure) connections. From the security researchers who created and demonstrated the BEAST (Browser Exploit Against SSL/TLS) tool for breaking SSL/TLS encryption comes another attack that exploits a flaw in a feature in all versions of TLS.

The new attack has been given the name CRIME by the researchers.The CRIME attack is based on a weak spot in a special feature in TLS 1.0, but exactly which that feature is has not been revealed by the researchers. They will say that all versions of TLS/SSL including TLS 1.2, on which the BEAST attack did not work are vulnerable.

Once they had the cookie, Rizzo and Duong could return to whatever site the user was visiting and log in using her credentials. HTTPS should prevent this type of session hijacking because it encrypts session cookies while in transit or when stored in the browser. But the new attack, devised by security researchers Juliano Rizzo and Thai Duong, is able to decrypt them.
Hijacking HTTPS Sessions

The CRIME attack code, known as an agent, needs to be loaded inside the victim's browser. This can be done either by tricking the victim into visiting a rogue website or, if the attacker has control over the victim's network, by injecting the attack code into an existing HTTP connection.CRIME doesn't require browser plug-ins to work; JavaScript was used to make it faster, but it could also be implemented without it, Rizzo said.

The attacker must also be able to sniff the victim's HTTPS traffic. This can be done on open wireless networks; on local area networks (LANs), by using techniques such as ARP spoofing; or by gaining control of the victim's home router through a vulnerability or default password. CRIME was tested successfully with Mozilla Firefox and Google Chrome.

Sunday, August 12, 2012

How Scammers Forge Email Addresses and How You Can Tell


image
Consider this a public service announcement: Scammers can forge email addresses. Your email program may say a message is from a certain email address, but it may be from another address entirely.
Email protocols don’t verify addresses are legitimate — scammers, phishers, and other malicious individuals exploit this weakness in the system. You can examine a suspicious email’s headers to see if its address was forged.

How Email Works

Your email software displays who an email is from in the “From” field. However, no verification is actually performed – your email software has no way of knowing if an email is actually from who it says it’s from. Each email includes a “From” header, which can be forged – for example, any scammer could send you an email that appears to be from bill@microsoft.com. Your email client would tell you this is an email from Bill Gates, but it has no way of actually checking.
Emails with forged addresses may appear to be from your bank or another legitimate business. They’ll often ask you for sensitive information such as your credit card information or social security number, perhaps after clicking a link that leads to a phishing site designed to look like a legitimate website.
Think of an email’s “From” field as the digital equivalent of the return address printed on envelopes you receive in the mail. Generally, people put an accurate return address on mail. However, anyone can write anything they like in the return address field – the postal service doesn’t verify that a letter is actually from the return address printed on it.
When SMTP (simple mail transfer protocol) was designed in the 1980s for use by academia and government agencies, verification of senders was not a concern.

How to Investigate an Email’s Headers

You can see more details about an email by digging into the email’s headers. This information is located in different areas in different email clients – it may be known as the email’s “source” or “headers.”
(Of course, it’s generally a good idea to disregard suspicious emails entirely – if you’re at all unsure about an email, it’s probably a scam.)
In Gmail, you can examine this information by clicking the arrow at the top right corner of an email and selecting Show original. This displays the email’s raw contents.
Below you’ll find the contents of an actual spam email with a forged email address. We’ll explain how to decode this information.
Delivered-To: [MY EMAIL ADDRESS]
Received: by 10.182.3.66 with SMTP id a2csp104490oba;
Sat, 11 Aug 2012 15:32:15 -0700 (PDT)
Received: by 10.14.212.72 with SMTP id x48mr8232338eeo.40.1344724334578;
Sat, 11 Aug 2012 15:32:14 -0700 (PDT)
Return-Path: <e.vwidxus@yahoo.com>
Received: from 72-255-12-30.client.stsn.net (72-255-12-30.client.stsn.net. [72.255.12.30])
by mx.google.com with ESMTP id c41si1698069eem.38.2012.08.11.15.32.13;
Sat, 11 Aug 2012 15:32:14 -0700 (PDT)
Received-SPF: neutral (google.com: 72.255.12.30 is neither permitted nor denied by best guess record for domain of e.vwidxus@yahoo.com) client-ip=72.255.12.30;
Authentication-Results: mx.google.com; spf=neutral (google.com: 72.255.12.30 is neither permitted nor denied by best guess record for domain of e.vwidxus@yahoo.com) smtp.mail=e.vwidxus@yahoo.com
Received: by vwidxus.net id hnt67m0ce87b for <[MY EMAIL ADDRESS]>; Sun, 12 Aug 2012 10:01:06 -0500 (envelope-from <e.vwidxus@yahoo.com>)
Received: from vwidxus.net by web.vwidxus.net with local (Mailing Server 4.69)
id 34597139-886586-27/./PV3Xa/WiSKhnO+7kCTI+xNiKJsH/rC/
for root@vwidxus.net; Sun, 12 Aug 2012 10:01:06 –0500
From: “Canadian Pharmacy” e.vwidxus@yahoo.com
There are more headers, but these are the important ones – they appear at the top of the email’s raw text. To understand these headers, start from the bottom – these headers trace the email’s route from its sender to you. Each server that receives the email adds more headers to the top — the oldest headers from the servers where the email started out are located at the bottom.
The “From” header at the bottom claims the email is from an @yahoo.com address – this is just a piece of information included with the email; it could be anything at all. However, above it we can see that the email was first received by “vwidxus.net”  (below) before being received by Google’s email servers (above). This is a red flag – we’d expect the see the lowest “Received:” header on the list as one of Yahoo!’s email servers.
The IP addresses involved may also clue you in – if you receive a suspicious email from an American bank but the IP address it was received from resolves to Nigeria or Russia, that’s likely a forged email address.
In this case, the spammers have access to the address “e.vwidxus@yahoo.com”, where they want to receive replies to their spam, but they’re forging the “From:” field anyway. Why? Likely because they can’t send massive amounts of spam via Yahoo!’s servers – they’d get noticed and be shut down. Instead, they’re sending spam from their own servers and forging its address.

Saturday, June 16, 2012

DDOS Attacks In 2012


2011 has been the year where massive DDOS attacks tooks place and most of them were directed by a group of hacktivists called Anonymous and lulzsec. DDOS attacks have totally moved from layer 4 to layer 7 as in layer 4, A hacker would need thousands of computers to attack a single server, where as in Layer 7 DDOS a hacker can easily take down a server with a single computer provided that if it's vulnerable. For those of you who don't know a DOS attack is a method of exhausting a server's resources and compromising it's availability.

Apache Killer


Apache killer is a DDOS/DOS tool written in Perl which sends HTTP GET REQUESTS with multiple byte ranges, These byte ranges occupy a wide variety of portions in the memory space which when abused causes Apache to malfunction.

It was introduced in almost middle of the year 2011, where half of the internet was left vulnerable. And the DOS attacks towards apache were increased by more than 200%. However a patch was released soon after the tool was introduced in the wild. You can read more about apache killer in the following post Zero day Dos vulnerability in Apache.

SlowLoris


Slowloris was also witnessed in the wild, however the intensity of this tool was pretty less then apache killer. Slowloris abuses handling of HTTP request headers
R-U-Dead-Yet


Where in 2011 Apache killer was seen to attack Apache webservers, A tool named R-U-Dead-Yet was also witnessed in wild exploiting HTTP Post Request in order to attack a IIS server. It implements DOS attack via long field submissions.

LOIC


With Apache killer and other tools getting patched on the server side, it was really difficult for the hacktivists to exploit big targets?, So how did they do so?. They used a famous tool called Low Orbit cannon or LOIC for short is by far one of the most famous DDOS tool even. Anonymous used this tool to exploit take down major targets such as payoneer. 

But what's so amazing about this tool as this tool is nearly unstoppable if it's being used by a massive number of audience to target a single website. It performs a DDOS attack by continuously sending a HTTP request. But what's more important to note about this tool is that in 2011, there were about 381,976 downloads. However this download amount has been already surpassed 2 months before in 2012

Image Credit: Imperva

RHA's Predictions For The Year 2012
  • In 2012, The DDOS attacks will be completely moved towards layer 7. 
  • LOIC would be the favorite tool for the year 2012.
  • Tools similar to Apache Killer may be expected. 
  • SSL DDOS attacks would be increased by a huge extent and more user friendly tools would be introduced. 

Monday, March 12, 2012

How to Identify Network Abuse with Wireshark


Wireshark is the swiss army knife of network analysis tools. Whether you’re looking for peer-to-peer traffic on your network or just want to see what websites a specific IP address is accessing, Wireshark can work for you.
We’ve previously given an introduction to Wireshark. and this post builds on our previous posts. Bear in mind that you must be capturing at a location on the network where you can see enough network traffic. If you do a capture on your local workstation, you’re likely to not see the majority of traffic on the network. Wireshark can do captures from a remote location — check out our Wireshark tricks post for more information on that.

Identifying Peer-to-Peer Traffic

Wireshark’s protocol column displays the protocol type of each packet. If you’re looking at a Wireshark capture, you might see BitTorrent or other peer-to-peer traffic lurking in it.
You can see just what protocols are being used on your network from the Protocol Hierarchy tool, located under the Statistics menu.
This window shows a breakdown of network usage by protocol. From here, we can see that nearly 5% of packets on the network are BitTorrent packets. That doesn’t sound like much, but BitTorrent also uses UDP packets. The nearly 25% of packets classified as UDP Data packets are also BitTorrent traffic here.
We can view only the BitTorrent packets by right-clicking the protocol and applying it as a filter. You can do the same for other types of peer-to-peer traffic that may be present, such as Gnutella, eDonkey, or Soulseek.
Using the Apply Filter option applies the filter “bittorrent“. You can skip the right-click menu and view a protocol’s traffic by typing its name directly into the Filter box.
From the filtered traffic, we can see that the local IP address of 192.168.1.64 is using BitTorrent.
To view all the IP addresses using BitTorrent, we can select Endpoints in the Statisticsmenu.
Click over to the IPv4 tab and enable the “Limit to display filter” check box. You’ll see both the remote and local IP addresses associated with the BitTorrent traffic. The local IP addresses should appear at the top of the list.
If you want to see the different types of protocols Wireshark supports and their filter names, select Enabled Protocols under the Analyze menu.
You can start typing a protocol to search for it in the Enabled Protocols window.

Monitoring Website Access

Now that we know how to break traffic down by protocol, we can type “http” into the Filter box to see only HTTP traffic. With the “Enable network name resolution” option checked, we’ll see the names of the websites being accessed on the network.
Once again, we can use the Endpoints option in the Statistics menu.
Click over to the IPv4 tab and enable the “Limit to display filter” check box again. You should also ensure that the “Name resolution” check box  is enabled or you’ll only see IP addresses.
From here we, can see the websites being accessed. Advertising networks and third-party websites that host scripts used on other websites will also appear in the list.
If we want to break this down by a specific IP address to see what a single IP address is browsing, we can do that too. Use the combined filter http and ip.addr == [IP address]to see HTTP traffic associated with a specific IP address.
Open the Endpoints dialog again and you’ll see a list of websites being accessed by that specific IP address.

This is all just scratching the surface of what you can do with Wireshark. You could build much more advanced filters, or even use the Firewall ACL Rules tool from our Wireshark tricks post to easily block the types of traffic you’ll find here.